Table of contents
| Filters maintenance |
| Changing bag |
| Disposable bag and filter replacement |
| Carbon dust filter replacement |
| Hybrid filtration maintenance |
| Permanent filter maintenance |
Warning : Always unplug from outlet before maintenance.
Regular maintenance of the filtration system is recommended to ensure maximum performance of your central vacuum
Filters maintenance
With filter without DataSync technology (E Series)
Your central vacuum is equipped with two filters. The anti-clogging filter (thin fabric) stops the larger particles, and the Cyclofiltre (thick fabric) catches the microscopic particles. The Cyclofiltre is equipped with an antimicrobial treatment to prevent the growth of mold, fungus and bacteria. This filter is washable in cold water (no bleach) and can be dried at low temperature.
1. To remove the filters, first remove the dust receptacle.
2. Use the straps at the base of the filters to withdraw. We recommend cleaning the anti-clogging filter (thin fabric) every time the dust receptacle is emptied. You may either shake it out, or rinse it. The Cyclofiltre (thick fabric) should be cleaned after four anticlogging filter cleanings, or approximately once a year.
3. Both filters must be completely dry before they are reinstalled. Carefully install them in the support grooves on the filter frame to ensure adequate protection of the motor. Install the Cyclofiltre (thick fabric) first, and the anticlogging filter (thin fabric) over.
Inspect the filters for tears and punctures before reinstalling them. Do not reinstall damaged filters.
Changing bag
For filtration with DataSync technology (GX, DL and HX series), simply hold down the reset button for 1 second. For regular models, the unit should work normally as soon as it is reconnected.
Disposable bag and filter replacement
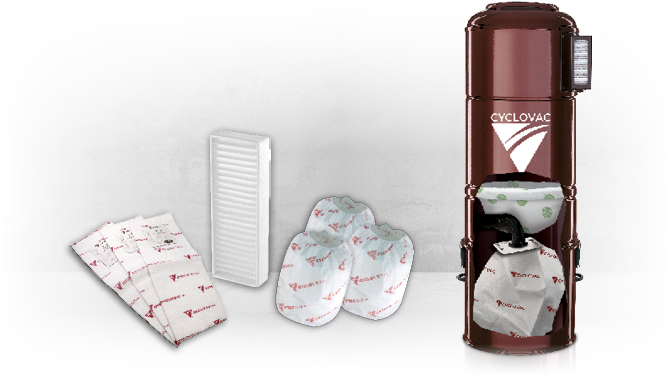
Filtration with bag (GS & GX Series except GS115 and GS110 models)
Replace the bag when full. Frequency will depend on use of the unit. For the GX series,the DataSync monitor will indicate when to change the bag. These indications are provided by an electronic timing board, only as a reference guide.
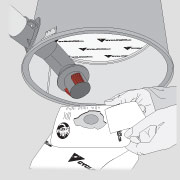
1. To access the bag, unlatch the two clips and remove the dust receptacle. Remove the used bag and seal bag opening (adhesive seal provided on each bag). Discard used bag.
2. Install the new bag, ensuring the tabs on the bag adaptor are aligned with the slots in the bag collar.
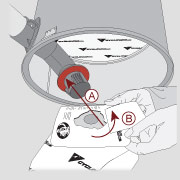
3. Ensure adequate sealing by inserting bag as far as retention ring (A). Rotate bag 20° (B) to ensure tabs on bag adaptor are no longer aligned with the slots in the bag collar. Put the dust receptacle back in place and seal by latching both clips.
Inspect the filters for tears and punctures before reinstalling them. Do not reinstall damaged filters.
Central vacuums 110 & 115 models with bag (GS115 & GS110)
Replace the bag when full. Frequency will depend on the use of the unit.
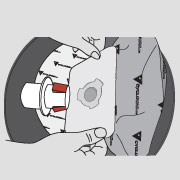
1. To access bag, remove the power unit top cover. Remove the used bag and seal bag opening (adhesive seal provided on each bag).Discard used bag. Install the new bag, ensuring the tabs on the bag adaptor are aligned with the slots in the bag collar.
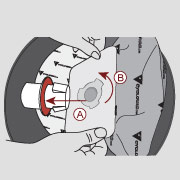
2. Ensure adequate sealing by inserting bag as far as retention ring (A). Rotate bag 20° (B) to ensure tabs on bag adaptor are no longer aligned with the slots in the bag collar.
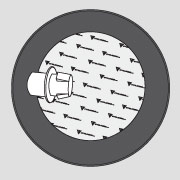
3. The disc-shaped filter, located between the dust bag and the motor, should be changed after three bags replacement (45 hours of use), or more often, as needed.
Only use genuine Cyclovac replacement bags. Failure to do so could void the warranty on your vacuum unit.
Carbon dust filter replacement
Except models 110, 210, 95, 115, 215 & 615
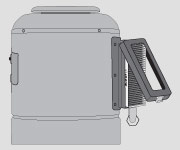
We recommend changing this filter after three bag replacements or after 45 hours of use. For central vacuums with DataSync technology (DL, GX & HX series), the DataSync monitor will indicate when to change the filter. These indications are provided by an electronic timing board only as a reference guide.
Part number: TDFILHEC2
Here's how:
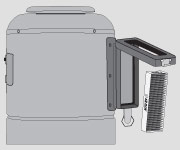
1. Unlatch the opening on the carbon filter case and gently lift it upward.
2. Remove the used filter, and discard.
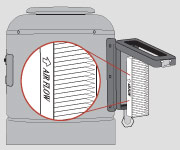
3. Insert the new filter. When doing so, ensure that the arrow printed on the filter itself points outwards. Close casing, and latch.
Hybrid filtration maintenance (H & HX Series)
Use with bag
Replace the bag when full. Frequency will depend on use of the unit. For the Hybrid filtration with DataSync technology (HX series), the DataSync monitor will indicate when to change the bag. These indications are provided by an electronic timing board, only as a reference guide.For maintenance instructions, please refer to the section: Disposable bags and filter replacement.
Use without bag
We recommend you empty the dust receptacle and clean the permanent filter at least each season, depending on use of your central vacuum.
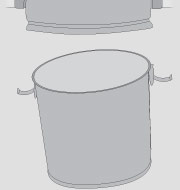
1. To empty the dust receptacle: Disconnect the unit from the electric outlet. Unlatch the two clips, remove the receptacle, and empty into an appropriate container.
2. To clean the permanent filter:
- Do not remove the filter
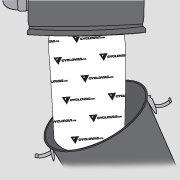
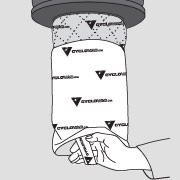
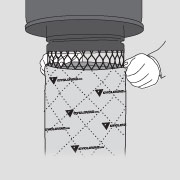
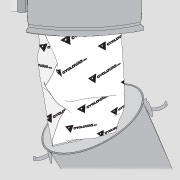
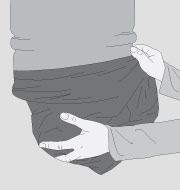
- Wrap the filter and the lower portion of the unit body within a large plastic bag. Hold it tightly around the unit with one hand
- With your other hand, gently shake the filter
- Wait a few seconds for the dust to settle before removing the plastic bag
Replace the dust receptacle and seal with the two clips. Reconnect the unit to the electric outlet.
Should the filter become stained, or emit an unpleasant odor, it may be washed in cold water (without bleach). Rinse and dry well before replacing. Do not tumble dry.
Permanent filter maintenance
This drum-shaped filter requires no maintenance. It will be checked by the authorized dealer when you have the vacuum power unit inspected, after approximately 500 hours of use.

